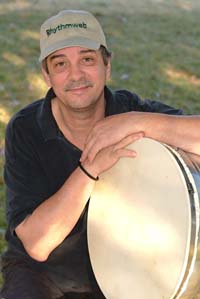
Coffee Can Drums
 The
coffee can drum is a portable, versatile, inexpensive drum, an ideal
"first Drum project. It responds well to a thin stick, with
techniques that vary from scrapng and striking the side of the can
to one hand/one stick techniques not unlike those used on sabar,
Mandinka drums, or certain Brazilian instruments.. The
coffee can drum is a portable, versatile, inexpensive drum, an ideal
"first Drum project. It responds well to a thin stick, with
techniques that vary from scrapng and striking the side of the can
to one hand/one stick techniques not unlike those used on sabar,
Mandinka drums, or certain Brazilian instruments..
The coffee can drum is one of a family
of homemade drums, including its big sister the Djun Basket. We
will eventually present many related drums, with whole sets of rhythms
and practice exercises to help teachers using homemade percussion
with their students.
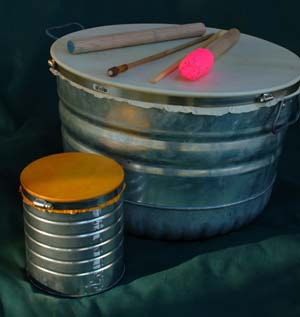
The drum can be one or two headed. One can use a smaller
can, put some beads or beans in, use two heads, and have a combination
shaker/can drum. These instructions are for a simple, single headed
drum. The two drums at right are specifically designed to be Spartan
in appearance, but one can apply a great many beautiful decorating
concepts for a truly personalized spirit drum. This is beyond the
scope of this article.:-)
Ingredients
1. One coffee can -
2. One radiator hose clamp, big enough to encircle the can and
skin.
3. One goat or fish skin, 8-10 inches in diameter.
4. A razor or X-acto knife, needle nosed pliers, screwdriver
5. Paint or fabric and glue to decorate the can, if desired.
Are you set to go? Okay, let's make
the drum..
1. Use an old fashioned can opener; the new kind takes the lip
off the can, and you want it ON there, to stop slippage. Decorate
the can ahead of time; if painting, give it time to dry. We leave
the area with the grooves unpainted, because the stick will be hitting
there a lot..
2. take the skin, and soak it in lukewarm water in the tub, until
it is pliable, but not so long as to make it thick and flabby; maybe
an hour for goat, a shorter time for fish. Check it frequently and
use the skin as soon as it becomes pliable. Do NOT use hot water.
3. while the head is soaking, get the rest of it ready, Tighten
the hose clamp down, just enough to make it a bit ;larger than the
diameter of the can.
3. Place the wet head on the can and center it.
4. Place the hose clamp down upon the head, and pull down around
the skin and basket. Tighten slowly and carefully most of the way,
allowing a bit of play for pulling on the skin. At this stage, if
you have a friend to help you pull the head down on all sides as
you continue to tighten, that will help. It's a little tricky, because
tighening anywhere on the ring of clamps will tighten all the way
around. Finally tighten it all the way down; you don't want it slipping
later, when you are playing it hard with a stick. Put it up and
let it dry overnight.
 5.
Your drum is now playable. You'll want to play it a bit before trimmming
off the excess skin, test it out; when you are satisfied that you
won't need to resoak and remount the head, take the razor knife
and CAREFULLY trim off the excess skin. 5.
Your drum is now playable. You'll want to play it a bit before trimmming
off the excess skin, test it out; when you are satisfied that you
won't need to resoak and remount the head, take the razor knife
and CAREFULLY trim off the excess skin.
Chris Bittner of www.drumworksbychris.com
made this wise suggestion: "The skin will shrink under
the clamp when it dries, so make sure and tighten it one last time
when it's dry, to take up any slack." You want to make sure
it doesn't loosen up under the stickwork.
Anyway, please send
feedback. Thanks for looking..
stu
|


 ©
1996-2008 Eric Stuer
©
1996-2008 Eric Stuer